Review of the Aoocci C3Plus Carplay device

I’ve been looking for an alternative to Garmin’s GPS universe for some time. The Garmin ecosystem seemed to be getting a little stale, with motorcycle equipment just one part of a huge range of (highly priced) devices, at the same time that Google Maps was becoming effortlessly reliable and useful – it really does save your previous searches etc. Added to that we have seen the development a number of moto-specific navigation apps designed for smartphone that should, in theory, transfer well onto Carplay. The particular app that I’ve signed up to is MyRouteApp.

My first attempt at escaping the Garmin ecosystem was trying, by which I mean spending an awful lot of money and selling again at a significant loss, a Thork Racing DMD T865 Android tablet. I didn’t get on with it for reasons I go into here.

When, as a result of some targeted promotional YouTube vids by the company that make Aoocci carplay units, I discovered one of these devices for less than £100, I was interested, like a lot of people. On their website the company claims to have been founded by a lone tech enthusiast working in his garage in HongKong. But there are many fake-origin stories put up by companies on the net, that its hard to know. (Run a Google image search on the photo of the ‘founder’ on some sites and you will often find that it is a stock photo used in a variety of other fake sites were the person in the photo is given different names.) Anyway, regardless, the company makes units that do no more than display your smartphone’s navigation and other selected apps on a small GPS-looking screen that you can fix in various places on your motorbike. I wouldn’t mind betting that many other buyers, like me, thought – if this turns out to be a pile of crap, I’ve only lost £80 or so…

So what is it like? So many of the sponsored promoters sing its praises.

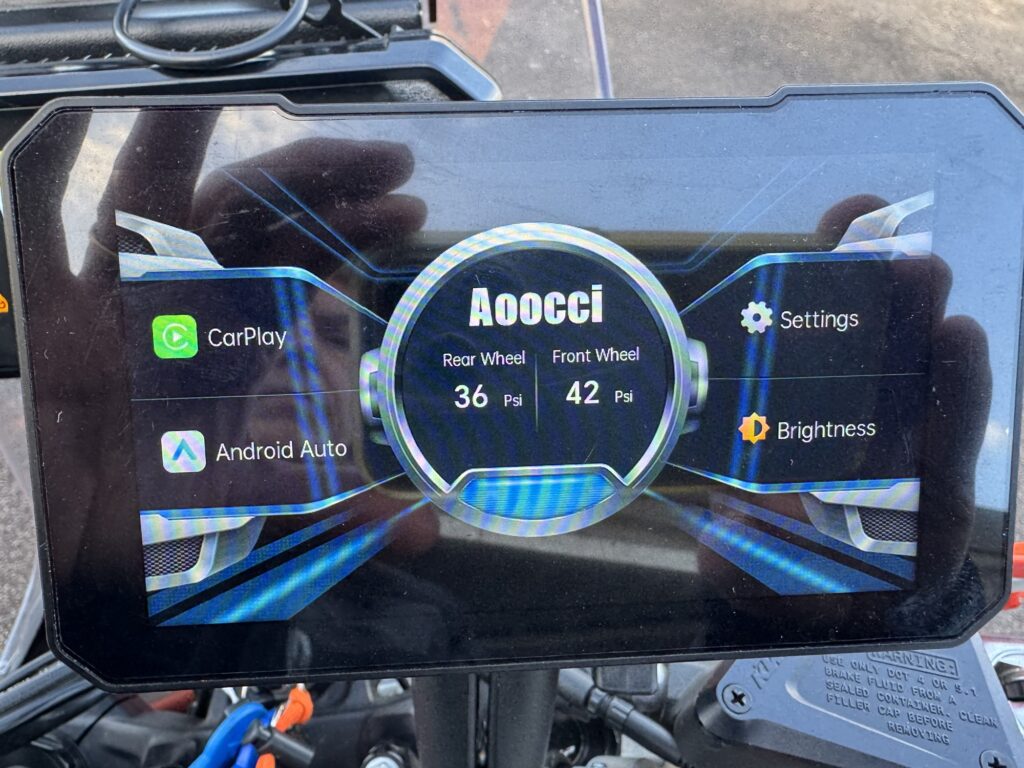
My version came only with wiring to hard-wire to the bike, in my case via a power distribution unit which made it simple for me. I would have connected it in that way anyway. The only problem was that without a usb connector for its proprietary connection you can’t experiment with it apart from when its connected to the bike and the bike turned on. And if things go wrong with the unit, as they did for me and, by the look of it, many other owners, you have to be able to plug it into a PC to update the firmware. Sorry no Macs – only clunky software for Windoze. Journey number 1: yes it works fine, using Google Maps – result. End of journey number 1: let’s connect it to the two supplied tyre pressure monitors – nice idea in theory – just to see how accurate it is. This is where the device stopped working for me and others. Updating its firmware is possible, and the company do have an update ready but its implementation is not straightforward though doable, eventually. So, back up and running let’s try again. The device starts up, works as before but seems to have gone off the idea of talking with the TPMS.

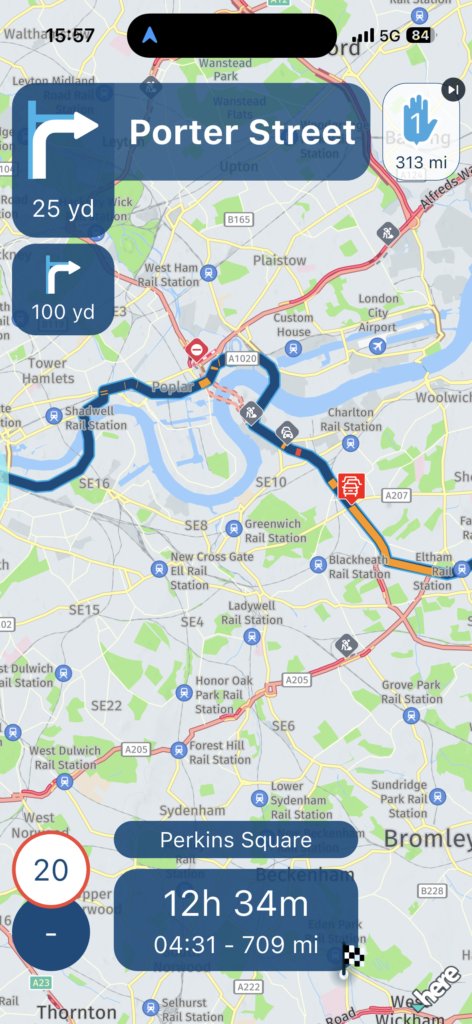
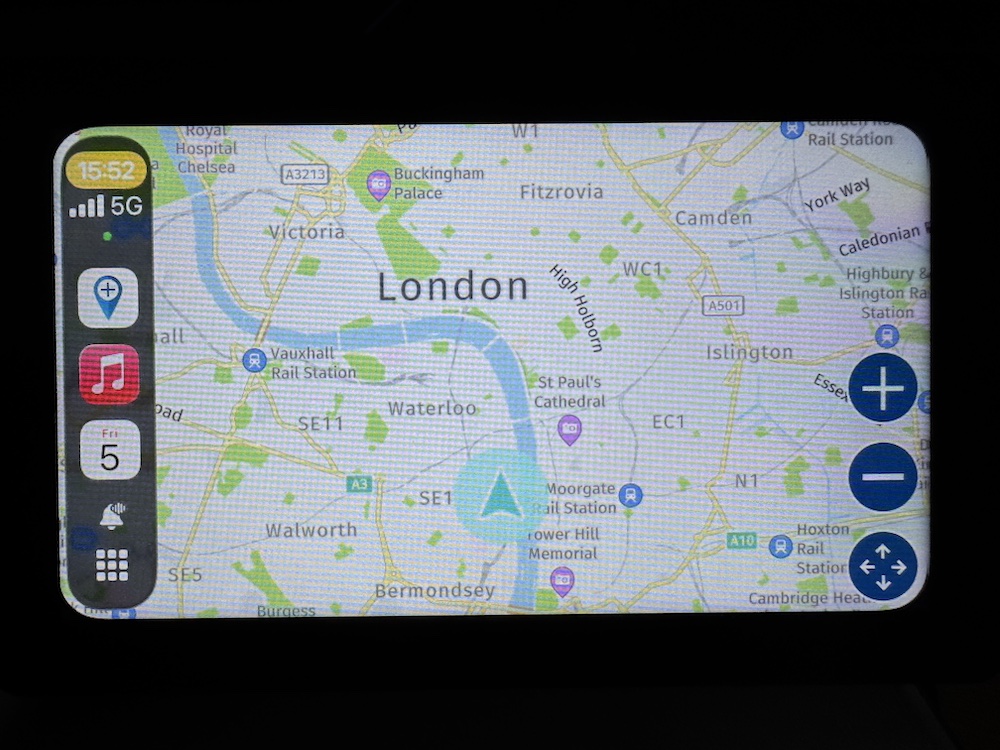
My second investigation was seeing how MyRouteApp would run via this device. Its smartphone implementation is good, though I have not used it because I have never mounted my iPhone on the bike. When connected to CarPlay I discovered that it has a limited usability. First here’s a screenshot from MRA on a smartphone. You can move the map around on the touchscreen nicely.

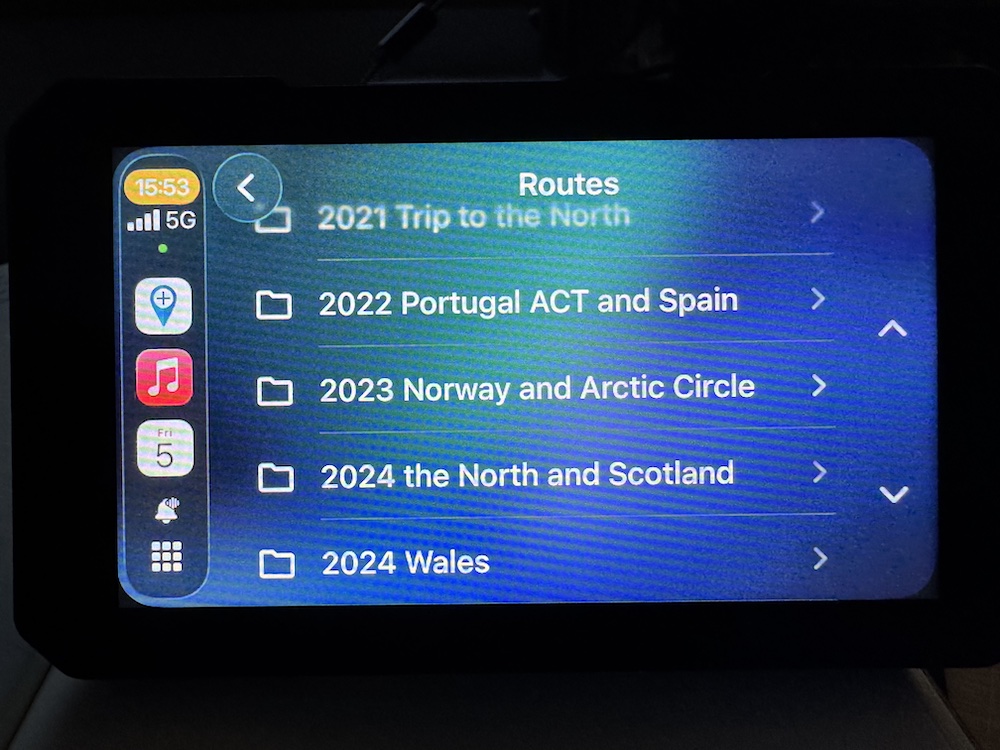
Now here is the implementation on the Aoocci device, using Carplay. The first screen shows my list of folders of routes I have previously plotted with MRA presented to me, the middle shot is what you see when you click on the search icon from the first MRA screen you see and the right-hand screenshot is the working map page from MRA. When you have Google Maps on the Aoocci screen you can move it around with your finger (if your gloves are not too thick) but with MRA you cannot move it. You have to tap on some direction arrows. This seems a limitation to me.

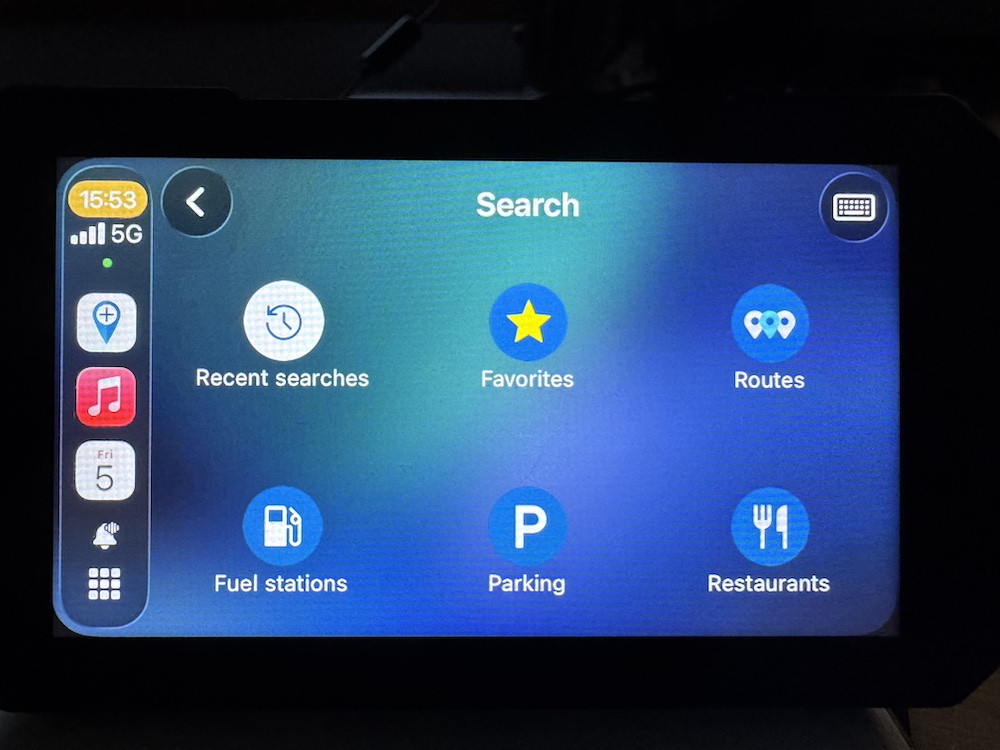
Obviously I like MRA’s ability to let you design a route quite simply and you could be guided by your smartphone. I am not sure how this is going to work using Carplay and the Aoocci device. I like the MRA ecosystem so want to persevere a little before trying something else.

I forgot to mention that I found the connection bracket that was supplied with the Aoocci unit was of limited use so I glued a RAM mount ball head that I had onto the back of the Aoocci mount and could fix it easily on an adjustable RAM mount.

I also forgot to say that perhaps the biggest discovery in this has been noise-cancelling Apple Earbuds (Pro 3 or similar). I have found that these do an amazing job of cancelling motorcycle and wind noise while allowing instructions from Google Maps to remain crystal clear. They fit very well under a helmet and don’t fall out when you take it off. The only slight downside, particularly when travelling and camping, is that they would be yet another thing to have to charge up at the end of the day.

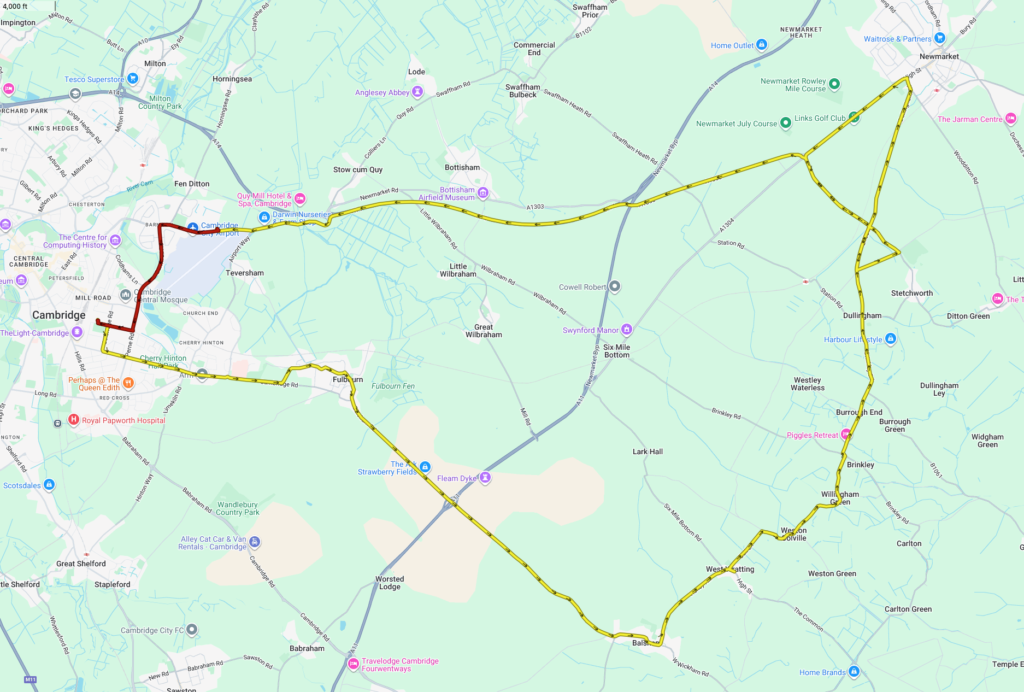
Update: now that I’ve tried using a route planned on MRA to navigate me on a thirty mile loop out to Balsham and Dullingham I feel a bit more positive about the set up and using MRA to navigate around a nice ride. All works well. It even makes a good effort to rescue you when you have gone off the route. The map is clear and the voice prompts are in good time. Once back I even managed to get Aoocci to read the tyre pressures though somehow they are the wrong way round. It showed me that my front tyre lost a lot of pressure – down to 18psi before I pumped it up again. I wonder what has happened to it.

Accurate tyre pressures just the wrong way round

Also displayed on the start up screen

Nikon Speedlight SB-24 in first use

One advantage of vintage gear is that everything associated with it is likely to be cheap, often very cheap meaning that you try things out that you wouldn’t normally consider. So, to my purchase of a Nikon F4, I have added a medium quality zoom lens Nikkor 28-105mm f3.5-4.5 AF-D (the review in the link pretty much confirms my own thoughts about the lens and its performance though I feel a little less generous – it only gets acceptably sharp after f5.6 and I would not describe its zooming action as at all smooth, nevertheless its a convenient lens to keep on the camera) – and today, just out of the box with fresh batteries, a Nikon Speedlight SB-24. This was a flash unit that was designed to work extremely closely with, specifically, the Nikon F4. It measures for the correct exposure through the lens during the exposure and as you change settings on the camera such as the aperture or the focal length of the lens the flashgun makes its own internal changes through its clever connections in the hotshoe. (it doesn’t seem to do any of this when fixed to a more modern Nikon like my D810 unfortunately). I’m yet to see the results of a few headshots that I’ve just taken, of course, until I finish the film and get it developed. Youtube offers some useful tutorials on the effect of various directions of pointing the flash head, along with the effect of fixing a white card to the top of the unit – which I have tried as seen in the picture here.

Upto now I have never been interested in using flash and most photographs that I have seen that do use it, even fill-in flash that is supposed to be subtle, have been the exact opposite of the kind of pictures that I am interested in taking. However, I can see that it is possible to use flash carefully and this speedlight/camera combination makes it particularly possible. My first assumption that you point a flash unit directly at (the face of) your subject was clearly (terribly) wrong – that’s why these units can tilt upwards and swivel from side to side of course – so that was my ignorance. I’m going to keep experimenting.

I’m expecting a waist level finder in the next week or so.

Two 1980s film cameras (Nikon-Pentax) compared today

Was it worth it to buy a new film camera when I had a perfectly good one in the drawer, one that I have owned since 1984? It was time for some comparisons. I put a roll of Tri-X through each and developed both films in exactly the same way. I scanned them with exactly the same equipment and settings though I might have made their curves a little different in Lightroom. I took some of the same subjects.

Pappenheim by Pentax

Pappenheim by Pentax ME Super (SMC 50mm f1.4) might have been shot at f2

Nikon F4 | Nikkor 50mm f1.4 AF-D | Tri-X Pan 400 Digitized with Nikon D810 | daylight Home developed in D76 | 6.75 mins | tank

The author photographed by Pentax

Nikon F4 | Nikkor 50mm f1.4 AF-D | Tri-X Pan 400 Digitized with Nikon D810 | daylight Home developed in D76 | 6.75 mins | tank

Bookshelf by Pentax

Nikon F4 | Nikkor 50mm f1.4 AF-D | Tri-X Pan 400 Digitized with Nikon D810 | daylight Home developed in D76 | 6.75 mins | tank

The images are very comparable and it takes a bit of magnification (more than you can do with these images here) to see that the Nikon seems to produce clearer, sharper images, possibly with more contrast though that could be a LR effect. What this comparison of a few images chosen from two rolls of 36 pictures does not show you is the completely out of focus shots that the Pentax produced, probably a good half dozen of those, plus a couple more where the exposure was wrong. The Nikon on the other hand did not drop a single shot. In terms of camera movement, neither of them compare with a modern camera with vibration reduction.

Above the contact from the Pentax

This is the Nikon

A(nother) New Camera: Nikon F4

Having bought Bellamy Hunt’s Film Camera Zen after spending some weeks checking out the old Nikon film cameras from the 1950s to their last F camera, I decided that one of these was for me. I enjoy the lightness and simplicity of my Pentax ME Super that I bought (duty free – supposedly) in 1983 or 4 at Singapore airport, but too often the images are poorly focused (by me) and never exactly sharp. I have hesitated about shelling out for a second film camera. I was interested in the last largely mechanical Nikon F camera, the F3, because of its reputation and nice style. Its currently selling for between £300 and £400 and I couldn’t justify spending that amount. But I noticed, in passing, an F4 at about half this price and have ended up spending around £200 for a beautifully preserved version that arrived this morning from Japan. The F4 was one of three transition professional cameras that Nikon made between mechanical film cameras and their first (professional level) digital SLR, the appropriately named D1. It was manufactured between 1988 and 1996. From the serial on the camera I have bought it looks like it was made in 1992. After the F4 came, predictably, the F5 which is huge and heavy and not just heavy like the F4, and the F6 which is virtually a digital camera that still uses film. Its clever but is on the market for around £1000.

Today, the day after receiving it, I put a roll of Tri-X through it. I wanted to test that basic things like the exposure meter and the focussing worked and also to see whether my more modern lenses would work with this 1980s camera. I shot the whole film in a little over an hour (a record for me – mostly it takes a few months to finish a film) and developed it just now in the kitchen. I was very pleased that my newer G lenses worked very well and focussed more quickly and quietly that the older AF-D lenses. I have quite a collection so its a real attraction for me.

Its old school but I made notes about every exposure so I can check that there are no problems with the camera.

Now that I have developed and scanned the first roll of film, I can say that it performs perfectly. The autofocus works and the exposure meter works very well. The only alert was that this camera predates vibration reduction so there is some obvious camera movement on shutter speeds less than 1/60. I will have to remember that.

Here’s some examples:

Nikon F4 | Nikkor 50mm f1.4 AF-D | Tri-X Pan 400 Digitized with Nikon D810 | daylight Home developed in D76 | 6.75 mins | tank
Nikon F4 | Nikkor 35mm f1.4 G | Tri-X Pan 400

Digitized with Nikon D810 | daylight

Home developed in D76 | 6m 45s | Tank
Nikon F4 | Nikkor 50mm f1.4 AF-D | Tri-X Pan 400 Digitized with Nikon D810 | daylight Home developed in D76 | 6.75 mins | tank

I’m hoping there is some way to bulk edit the camera info in Lightroom etc. In terms of workflow, I have made a preset that makes positive images from the scanned negs, then each image just needs a little tweaking of its curve. This will be fine for B&W but colour negatives are much more tricky and I might resort to Negative Lab Pro, a plugin that costs about £75 at the moment so not cheap. Trying it – the camera and Negative Lab Pro, with some Kodak Gold – about half the price of Portra – is my next plan.

New Touratech Luggage option for KTM790Adv

Even though the KTM catalogue from 2019 – its the last one that made it into my house – shows their middle-wieght adventure bike, the 790 Adventure, fitted out with black aluminium panniers, most riders seem to put soft, weight-saving luggage on the bike. The brand in vogue seems to have been Mosko Moto. You can fit a surprising amount of travel gear into their Reckless 80 litre bags.

I got drawn into that but always secretly wanted the convenience of some hard luggage, especially when going on a short ride or to do some shopping. And my Touratech aluminium luggage left over from my last BMW was still taking up room in my garage which is also full of a kitchen, old vacuum cleaners and furniture. And a topbox is a handy place to store your helmet while you are in the supermarket. I tried some nice strap-on tail pack from Kreiga, mounted to the Perun rack that I fitted soon after buying the bike a few years back. It was great for carrying some tools on a ride but not much else. Eventually I have caved in and started investigating fitting the mount for my Touratech top box onto my 790. You have to buy the whole set up to get the tubular mount. But Touratech in the UK could not tell me when the black version would come into stock so we agreed to try the kit made for the Husky 701 as they are very similar bikes. The cost was £150.

The kit arrived and on my first attempt to fit it I found that the Husky and the KTM have very slightly differently placed holes for the bolts that fit the rear rack. My second attempt involved fitting the tubular mount onto my Perun rack which was fiddly but possible. And it does not look too bad.

The top box would be much better if black but is fine. I don’t think the taste police will pull me over for it.

tt rack and Zega Pro from the back

Travel tripods – its a nightmare

Well, not quite that bad – just a difficult choice. A huge leap in interestingness of motorcycle travel video is some variation from the overused first person POV helmet camera footage to actual footage of rider riding into and out of shot on some beautiful corner on a twisty road. We’re so used to seeing seamless continuity on feature films that we don’t even notice it on motoYoutubers efforts, yet effort it takes to achieve. We must make some unconscious assumption that there is a film crew riding with our favourite motoYoubuer. Maybe on occasions there is but often its not the case. And how’s it done? With a laborious setting up of a shot in advance: scouting, stopping, riding back, getting out your tripod, trusting leaving your beloved camera running and unattended while you jump back on the bike, ride off, turn round and ride back into shot looking nonchalant; then stop again, ride back, pack everything away and ride off and repeat a few times a day. You really wouldn’t get very far in a day. It takes high motivation to record something to go to all this trouble. The other far less troublesome use of tripods is to film yourself unboxing and trying out various gadgets from camping stoves to er… new tripods.

So, having thought that I might just possibly try this, at least use number two, I am searching for the ideal lightweight tripod. There are actually a huge number to try to chose from. The high end carbon models cost over £300. They tend to get good reviews – but that’s a lot to spend on something that may be a very short-lived experiment. Then there are the scores of mid to cheap models, often praised highly by Youtubers who probably have only used them once or twice and like the design. Amazon reviews provide usually more sober evaluations. These cheap tripods are cheap because they might use a soft component where a slightly expensive piece of aluminium would have been better. So reviews show that these are often not very strong. I have been on the verge of ordering so many of these then read poor reviews and stopped in my tracks. The latest is this:

I have never heard of Sirui – but then I have never heard of most of these brands. Its small, its light and its cheap. I may risk it. But will I risk actually trying it out on a windy corner in Norway on my next trip?